
Digital Signage
How to Use Reach: Creating New Slides
This tutorial is a step-by-step guide to creating a new slide from a .jpg or .png file. If you would like to create an announcement slide from a .pdf, or would like to batch upload multiple slides at a time, visit our Batch Uploads tutorial!
Go to the “Announcements” tab of Reach and select the playlist to which you will be uploading your new slide. On the Announcements screen, you will see four blue boxes across the top of the page:

Select the button that says “Create New.” This will bring you to the announcement creation screen. From this screen, you can edit pre-existing announcement slides, add images previously uploaded, upload new images, and adjust things like size and placement.
Note: Remember that your image files should be in RGB mode and not CMYK. CMYK files will cause your colors to render in an unfavorable way.
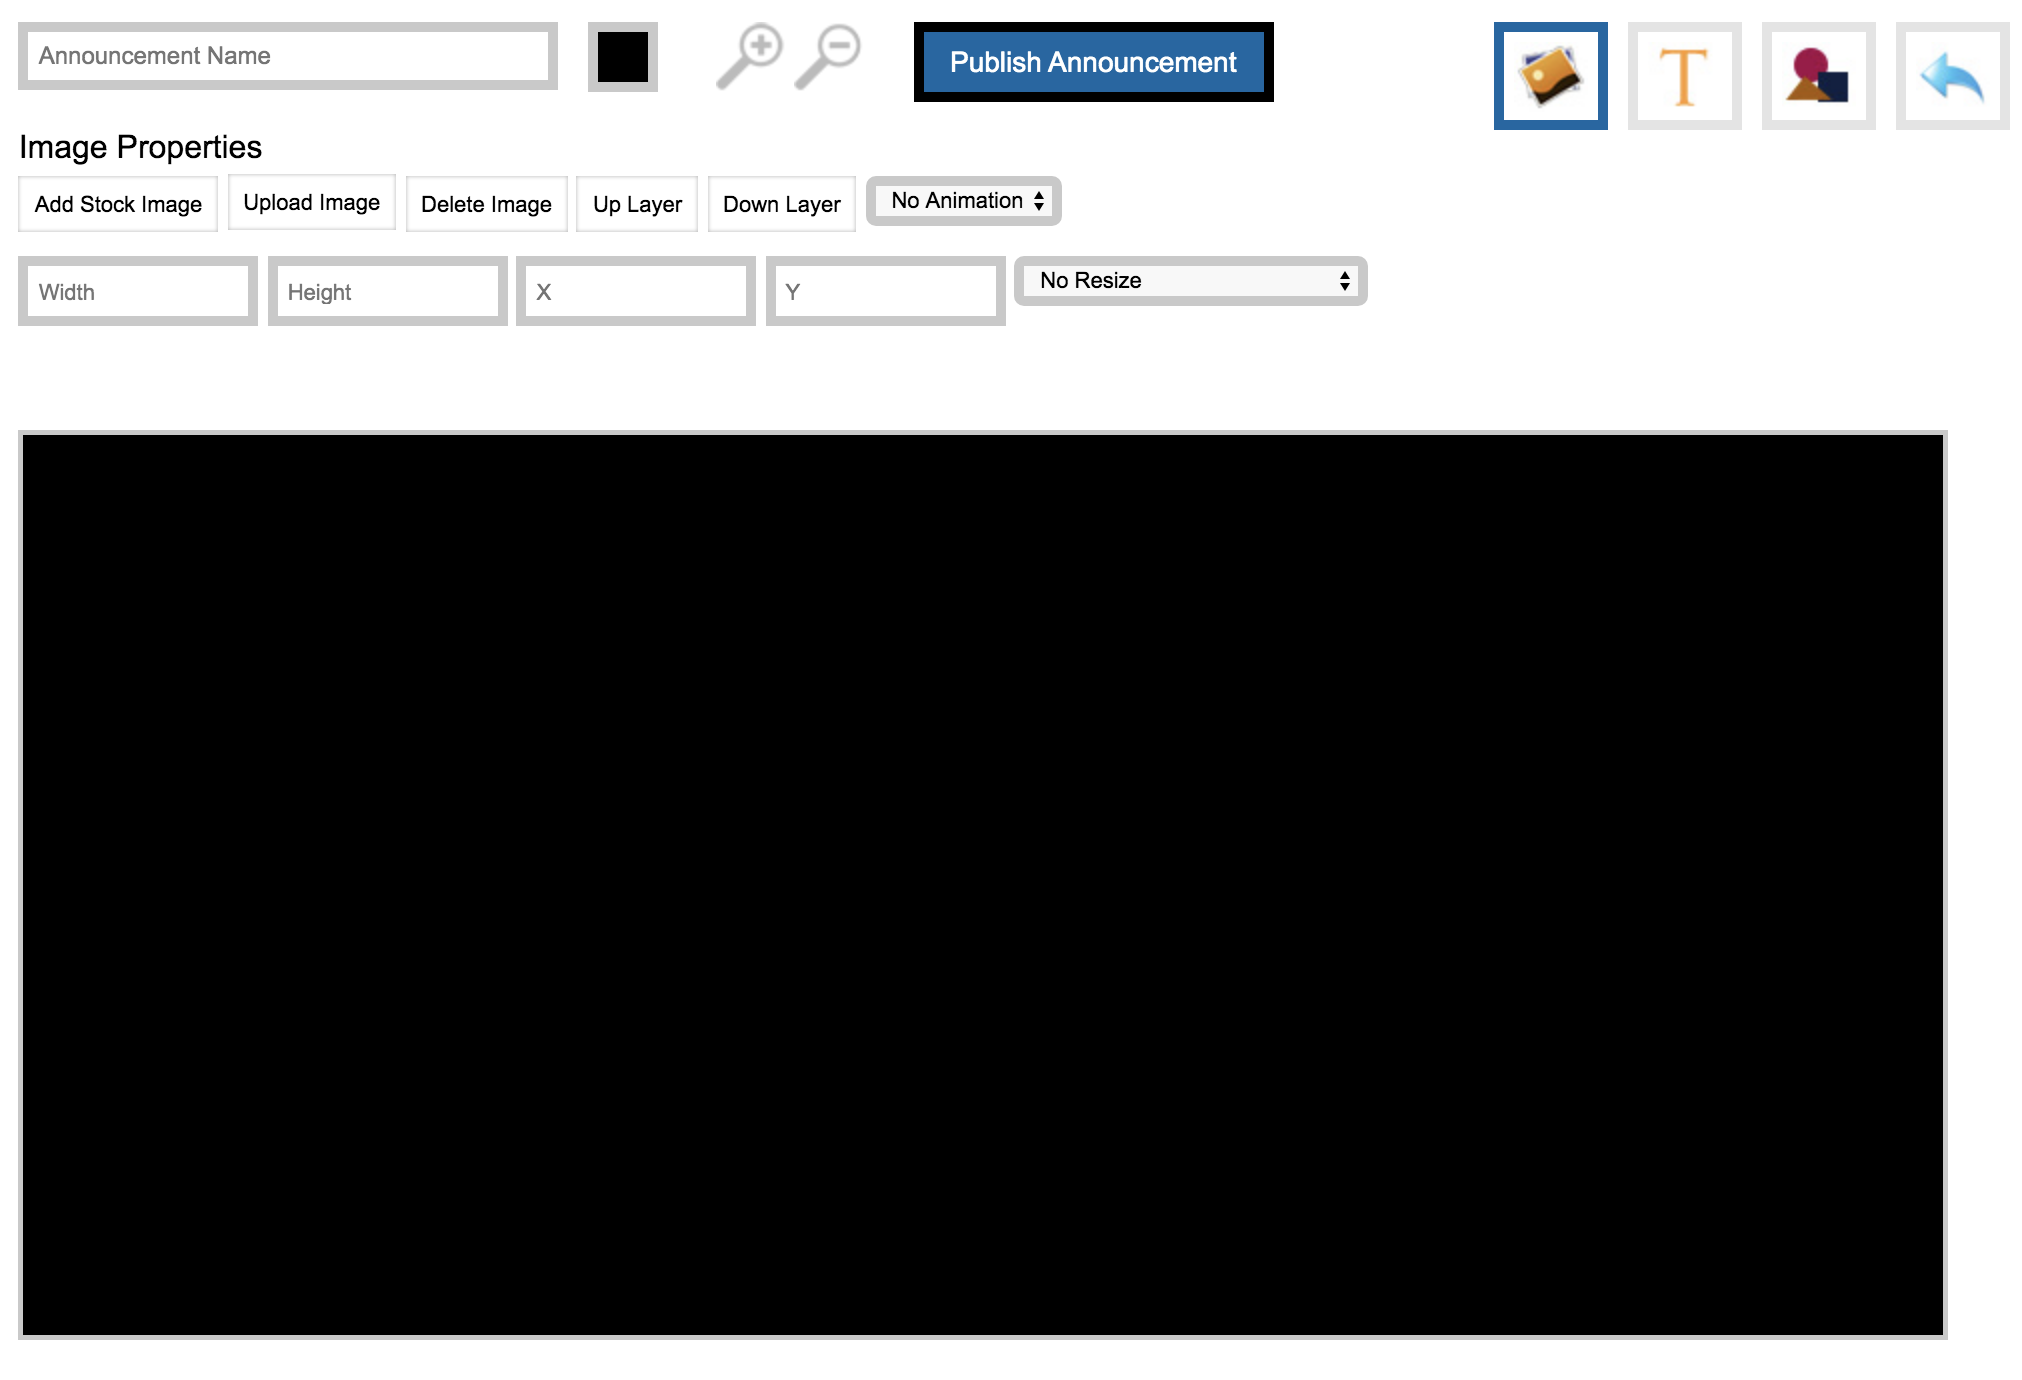
To upload your new slide, click the “Upload Image” button. You can upload slides that are .jpg or .png using this method. A dialog box will open, allowing you to select the file on your computer. Once you’ve uploaded your file, the boxes under Image Properties will populate with information about your file.
Width: The width in pixels of your image.
Height: The height in pixels of your image.
X: The horizontal position of the top left corner of your image.
Y: The vertical position of the top left corner of your image.
“No Resize” Dropdown Menu: A dropdown menu with some basic resizing options. We recommend against using this
option as it abnormally stretches images.
If your file was made at the size of your sign’s screen (1920x900 for horizontal screens, 1080x1740 for vertical screens) it will appear centered in the black preview box and will fill it edge-to-edge. We highly encourage you to upload files already at-size to make uploading quicker and easier. If your file was not made to size, you will need to do some work to make it fit at this point.
For horizontal screens: Enter “1920” in the Width box. If you are using a horizontal image, it will automatically fill the width of the preview box. It will likely cut off some of the image on the top and bottom; you can use your mouse to reposition the image so that it is centered on your content.
For vertical screens: Enter “1740” in the Height box. If you are using a vertical image, it will automatically fill the height of the preview box. It will likely cut off some of the image on the sides; you can use your mouse to reposition the image so that it is centered on your content.
Why can’t I just stretch the image to fit the screen preview? Stretching the image will squish the contents and cause your announcements and pictures to look strange. To maintain a professional look, avoid stretching images.
Once your image is centered appropriately and no black is showing, you can click the “Publish Announcement” button. A box will pop up called “Publish Content.”
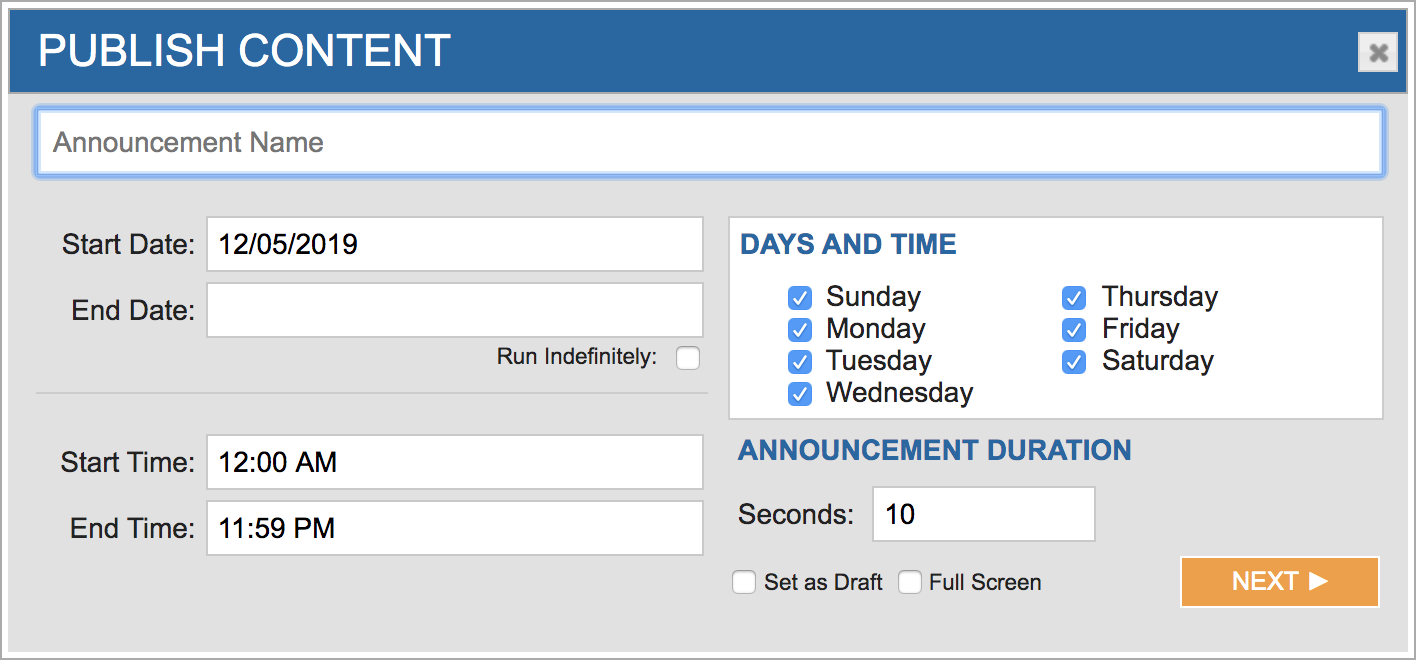
If you haven’t already named your announcement, you can do so now. Select a Start
Date and End Date to have your announcement run for a certain period of time (very
helpful for event and time-sensitive content that will expire) or else keep the Start
Date as today’s date and check the box that says “Run Indefinitely.”
If you would only like your new slide to run certain times of day and/or on certain days, you can do that using Start Time, End Time, and “Days and Time”.
Select the duration of time your new slide will appear each time it appears in the playlist rotation. On the whole, keeping it at the default is preferable.
3 Seconds: for slides that have images, but no text that needs to be read
5 Seconds: for brief announcements with very little text
10 Seconds: standard length, suitable for most slides
Over 10 Seconds: only go longer than 10 seconds if you need to force something to appear for an extended
period of time.
If you’re not ready to have your new announcement slide go live yet, you can select “Set as Draft,” and it will appear in your playlist but will not go live until you click “Click to Approve” on the Announcement playlist screen.
Do not click the option to make your new announcement slide full screen.
Click “Next,” and you will be able to select which playlist this announcement should appear on. You will only be able to see playlists within your area. If you have access to screens that are not your own, be careful not to post to someone else’s sign.
Click “Publish,” and you’re done!
If you need to change where your new announcement appears in the order, remember that you can do so on the main Announcements screen by clicking “More Options” and then “Change Order.”


